Wednesday, June 25, 2014

Wednesday Weekly- The First Installment!

As I am working on this blog post in the backyard, my boys are practicing to become American Ninja Warriors.  I love that technology has become portable so I can keep an eye on them and be productive at the same time.  The fresh air is a bonus too.

Today is the first installment of the Wednesday Weekly!  I'm hoping to share every Wednesday a new Project Life (PL) layout with tips, hints, and ideas. As with Photo Friday this may or may not happen every week but I will try to be consistent.  My goal with this is to not only give you, my readers, ideas but to keep me on track and continuing to get those pages done and in my album. Last week I gave you some tips on how I organized and printed my photos so let's put those photos to good use and create a layout!

I'm starting this section of PL pages in my album with the new year.  These are the most current photos I've worked with in a long time and it was really fun!  As I said last week I'm thinking of these PL layouts as a sort of photo journal. I wanted to include the highlights for our family during that first week in the new year. Here is my two page spread. 


I am getting quite the collection of PL supplies and not that I need anymore but I recently started a subscription to the Studio Calico Project Life kit. It is so fun having supplies delivered right to my front door every month!  As an added bonus I get to use supplies I might not normally buy which keeps those creative juices flowing.  I had already started this page when my first kit, Office Hours, arrived. I was so excited that the supplies in this kit matched the cards from the Honey Core kit I had already picked out!

To create my title card I cut a word bubble from a card in the Honey kit and used the polka dot card from my Office Hours kit.  I never use to cut apart a PL card but sometimes they just work better when you do. It also allows you some more artistic freedom. I loved using these word bubbles throughout my layout and cutting some cards allowed me to do just that. A tag stamped with the date and letter stickers from the Office Hours kit complete this title card. 


When I first saw this card in my kit it reminded me of fireworks and I knew that it had to go on this page.  I stamped the year in some white ink and that filler card was done. 


I love adding stamps to an already cute card to add just a little to the feel of the layout. This camera stamp was perfect for just that!


Another new love of mine is washi tape!  I really don't think you can ever have enough!  Be prepared to see washi tape used on most of these layouts. I'm warning you now. ;)  This card was just a plain card with a red border but by adding two kinds of washi tape, a cork sticker, and using a stamp I made a very cute home for this photo. 


I use my iPhone A LOT. Most of the time it does great but in those instances (like a dark movie theater) when it doesn't a photo app does the trick. I brightened this photo and it was the perfect memory of going to see Frozen!  Remember that your photos don't always have to be perfect. As long as they help tell your story include them!  I also added some old silver letter stickers from my stash to put the title of the movie on an unimportant part of the photo. This is a great way to add extra journaling or a subtitle if you don't have a lot of space. 
                             

I have found that I normally don't take a lot of horizontal 4x6 photos with my iPhone. That means I need to use smaller photos to fill up those spaces in my pocket pages. Textured card stock that is already cut to the 4x6 size is perfect for these photos. They come in sets that match the PL core kits too.  By adding a 3x4 card and some letter stickers I can easily full up this space in a fun way. 


Here are a couple of close ups of each individual page. 


I hope you've enjoyed this first Wednesday Weekly.  I hope to be sharing many more. Thanks for stopping!


Supplies:
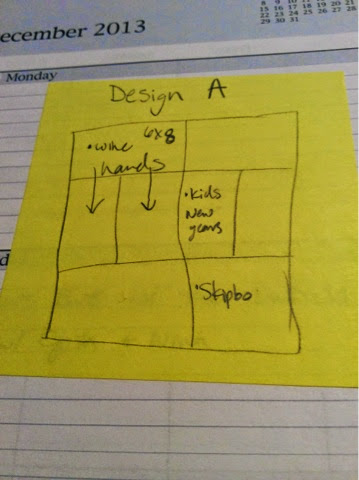
  • Project Life- Honey core kit, Studio Calico Office Hours kit, Jade textured card, Design A pocket page, PL pen (03 black)
  • ink- Memento (Tuxedo Black), Close to My Heart (White Daisy)
  • stamps- My Mind's Eye (Chalk Studio), Teresa Collins (He Said She Said), Autumn Leaves (Cutesie Alpha), Basic Grey (Hello)
  • alphabet stickers- Basic Grey (Capture), American Crafts (Thickers Delight), Frances Meyer (Flower Pot Silver)
  • misc- My Mind's Eye (washi tape) 

Friday, June 20, 2014

Photo Friday- Captured Classics

Last week we finished our first session of swimming lessons this summer. All four of the boys passed!  They were so excited!  We decided as a reward we would grab some takeout and head over to Quaker Steak and Lube for classic car night. The boys loved it!  It was so fun to walk around and see all of the classic cars. This is one of the many reasons I love my iPhone. Not having planned this I didn't have my DSLR with me but was still able to get some great shots thanks to that handy little gadget. Enjoy and thanks for stopping!


Wednesday, June 18, 2014

Project Life Photo Organizing Process

This summer is just flying by!  Between camp, swimming lessons, VBS, and life in general we have been busy. That means lots of fun pictures but not lots of time to scrapbook them. That's why I'm excited to be trying a new way to scrapbook and loving it!

If you follow my Facebook page or follow me on Instagram you know that I have finally started a true Project Life (PL) album.  I've been using the cards and divided page protectors on layouts in my albums for awhile but they have all been single subject layouts. This new album I have started is in a weekly format and I have been loving it!  I take so many random pictures on my phone that normally would not 'make the cut' in my normal albums but work great in these weekly spreads. I'm using this format for our family album starting this year and love seeing what our weeks look like at a glance. I think of it as a photo journal of sorts. One thing I have changed from a normal PL layout is that even though I'm doing a weekly format I'm not labeling each layout Week 1, Week 2, etc.  The main reason for this is that our family albums are based on our anniversary which is at the end of June so my family album runs from July-June.  I don't feel that I need to label the weeks in that way but do put the date of each week on my layout.

I'm hoping to regularly share a PL layout each week on Wednesday and I'm going to start this week by showing you how I am getting everything organized to start working on these layouts and get them done quickly. I know this won't be very exciting but sometimes it's good to see what goes on behind the scene. I'm assuming you already have all the supplies needed (an album, PL core kit, page protectors, and a pen) so I'm leaving out gathering those things. I'm focusing on the photos and how I organize them and put a layout together.

My iPad is a huge help when it comes to organizing my photos.  I start by gathering all of the photos I want to use in my camera roll and then put them in folders based on the week they are from.  These photos are from both my iPhone and DSLR. I started at the new year even though this album will really start back in July (I'll go back and finish that later). I also worked with only three months of pictures so I wasn't overwhelmed. If you don't have an iPad you could do this in folders on your PC or if your photos are already printed just grab some envelopes and label them with your week on the front and put the photos inside. Here is a screen shot of what my folders look like. 
Once your photos are in folders you can then decide which photos to print and what sizes to make them.  I'm still perfecting this part of the process and I'm sure will change the way I do this but for now I decided which photos would be full 4x6 and which would be 3x4. To get my 3x4 photos on one 4x6 print I use the PicFrame app. Here is a great explanation on how to get those photos set up. I also use many Instagram photos and this time around printed them in two different sizes because I was not really sure which size would work best.  I've used both sizes on my layouts and will probably continue to do so.  Here is a peek inside a folder so you can see the large photos and the ones that I used with the PicFrame app. 
Once I have figured out all of my sizing I send the photos to print. I typically use Walgreens but this time around I tried out Costco. You could use any photo printing service or print them at home. Once they are printed now it's times to sort them back into physical piles that match the digital folders. 

I guess I should back up a bit and explain how I decide which photos to print large and which to make smaller. I grab a pile of post it notes and my journal and decide which PL page protector I'll be using and actually sketch a page to put in the journal.  If you search on Pinterest you can find PL planning pages but I feel this works the best for me.  I jot down photo placement and use that as a guide to choose sizes and print the photos.  From here I put all of the page protectors in my album in order and place all the printed photos in one pocket on each week of the album.  These sketches of sorts might not be where the photos end up but it gives me a starting point. 

So that's how I work on getting my photos organized and ready to add to my PL album. If you've stayed with me this far kudos to you!  I know this is a little wordy and not super exciting. I just wanted you to see my process. Next week I'll share an actual layout. I promise. Until then thanks for stopping!