Thursday, December 18, 2014

Thank You Shaker Card

Shaker cards are everywhere right now!  With all of the awesome sequins, seed beads, and glitters out there no wonder they are so popular.  I think my stash of these items needs to grow a little bit!  I've made shaker elements for scrapbook pages but never on a card so I thought I'd give it a try.  Here is my Thank You Shaker Card.

I started by picking a sheet of patterned paper to get a color theme going.  I cut it to the size of the card front and then cut another panel from the middle of this paper to be the popped up part of my shaker.  I knew I would be backing this piece with white cardstock so after cutting a circle from the front panel I traced it onto the piece of white cardstock that will be the back of the shaker.
I then started stamping my sentiment.  I started with the black text to be the main thank you and then stamped around it using ink colors that complimented my patterned paper.  I found that using a second generation stamp (inking your stamp, stamping it once on a scratch piece of paper, then stamping on your project) worked much better to match my color scheme.  Once I filled in the whole circle with my thank yous I erased the pencil line.
I then covered the back of the patterned paper circle with a sheet of transparency cut to size.
Next you need to make an area for your shaker pieces to move around in.  I used foam adhesive cut to size to go all around the circle.  I doubled my foam adhesive so there would be plenty of room for my sequins to move around.  How tall you make this depends on the thickness of your foam adhesive and the items you are putting in your shaker.
Now for the fun part.  Put your sequins, seed beads, or glitter into this area.  I used 5 or 6 different colors of sequins that complemented the colors in my patterned paper.  Once you have your shaker items in remove your adhesive backing and carefully place the back on your shaker piece.   
Once it is adhered you have your shaker piece!  Isn't that fun?!  I just love it!!  You can then adhere this piece to your card base and your card is done. 
If you want to see more great shaker cards here are some of my favorite card makers and their shaker cards.  I hope they inspire you as much as they inspire me.  Thanks for stopping!  
  • Nichol Magouirk  has some AMAZING shaker cards!  There were just too many lovely ones to list just one so this should link to all of her fun shaker cards.   
  • Jennifer McGuire has some great tips on making shaker cards.  I can't wait to try some of these tips out on my next card.  
  • Laura Bassen always has fun colorful cards and her shaker cards are just that.  Fun and colorful.  
  • Kristina Werner has a great Christmas shaker card.  I just love her cards!  

Supplies:
  • ink- Tim Holtz Distress (Wild Honey, Worn Lipstick, Mowed Lawn, Dusty Concord), Close to My Heart (Spangled Blue), Memento (Tuxedo Black)
  • stamp- Hero Arts (CL342)
  • patterned paper- Die Cuts with a View (Everyday Stack)
  • tools- Perfect Layers, Creative Memories (Circle Cutter)
  • misc- foam adhesive, transparency sheet 

Friday, December 12, 2014

Photo Friday- Baby Ean

Has it really been a month since my last post?!  'Tis the season to be busy.  With school programs, choir rehearsals, and Christmas preparation life has just gotten busy.  I really am going to try to be updating my blog more once the new year rolls around.  Keep your fingers crossed.

Today I'm sharing a few pictures of my close friend's newest arrival.  This is her third child (second boy) and he fits right in with his red hair.  I don't normally take newborn photos so I still have a LOT to learn.  Ean was a good sport though and I got a little practice in.  I just love his sweet little nose and those tiny lips!  You really do forget how small they are when your youngest is almost 6.  They grow up way too fast and I'm so glad that I could help them capture this moment of his life.  I hope you enjoy these photos of sweet Ean.  Thanks for stopping!   


Thursday, November 13, 2014

Frozen Inspired Birthday Card

It has been way too long since I've shared a card idea with you.  Now that the weather has turned colder and it has snowed I think that this card is really appropriate.  My niece turned 5 on Sunday and she loves the movie Frozen.  What little girl doesn't?!  I thought I would use purples and blues, snowflakes, and some sparkle to make my Frozen themed card.  Here's what I came up with.
I just love how this card turned out!  I didn't take any step by step pictures (sorry) but here is what I did to create this card.

I started with a piece of white cardstock cut slightly smaller than my card base and inked it using Milled Lavender, Dusty Concord, Tumbled Glass, and Broken China Distress Inks.  I kept blending until I got the look I was going for.  I then embossed the cardstock using my Snowflakes embossing folder.  Next, I applied VersaMark ink to the raised area of this cardstock and applied Holographic embossing powder and heat set it.  I love the texture and sparkle of this background!
I then worked on my sentiment/image area of the card.  I recently got the Cupcakes and More stamp set from Fiskars and wanted to try it on this card.  I stamped the cupcake wrapper with Memento Tuxedo Black ink and then used my Spectrum Noir markers (LV1 and LV2) to color it in.  These markers are also new to me and I only have one set of purple.  I am still seeing if I am successful at using them before I get more.  This was an OK start.  I then stamped the frosting with Broken China Distress Ink.  I used my Heat and Stick Powder to make the frosting sticky and then covered it in glitter.  I don't think you can ever have enough sparkle!  I fussy cut both of these out and attached them to a block of white cardstock.  I added 5 candles which are also in the stamp set (before I added the frosting) and stamped the sentiment above and below the cupcake.  A little ink around the edges with some more Holographic Embossing Powder and this was ready to put on the card.  I used two pieces of sheer ribbon to anchor the block to the card.  The ribbon also looks like a ribbon on a present adding to the overall feel of the card.   
So there you have it.  By using a few things from the movie as inspiration (color, snowflakes, and sparkle) I was able to create a fun themed card.  So the next time you need to make a card look no further than the child's favorite movie to give you inspiration.  Thanks for stopping!


Supplies:
  • ink- Tim Holtz Distress (Milled Lavender, Dusty Concord, Tumbled Glass, Broken China), Memento (Tuxedo Black, Potter's Clay, Lulu Lavender), Versamark
  • stamp- Fiskars (Cupcakes and More)
  • embossing powder- Ranger (Holographic), Stampin' Up! (Heat and Stick Powder)
  • Spectrum Noir markers- LV1, LV2
  • misc- dimensional adhesive, ribbon, Recollections (Frost glitter), Cuttlebug (Snowflakes embossing folder)

Friday, November 7, 2014

Photo Friday- Daugherty Family

Hasn't this fall weather been just wonderful?!  I just love the gorgeous colors of the leaves, the bright blue sky, and the crisp air.  It's the perfect weather to get some family photos taken!  I had a great time with the Daugherty family a few weeks ago.  We couldn't have asked for a more beautiful day and I think that is evident in these photos.  It was a great day for a great family.  Thanks for stopping!


Sunday, November 2, 2014

It's Halloween!! (Part 2)

I hope you all had a fun and safe Halloween.  We had a great time despite the chilly weather.  As promised here are some more pictures of our Ninja Turtles.  Enjoy and thanks for stopping!

A huge thanks to the hubby for finding the perfect spot for some Ninja Turtle photos. 

Zach as 'Donatello'

Alex as 'Michelangelo'

Tanner as 'Raphael'

Geoff as 'Leonardo'


You can't be Ninja Turtles without eating some pizza.


Jenny as 'April O'Neil'


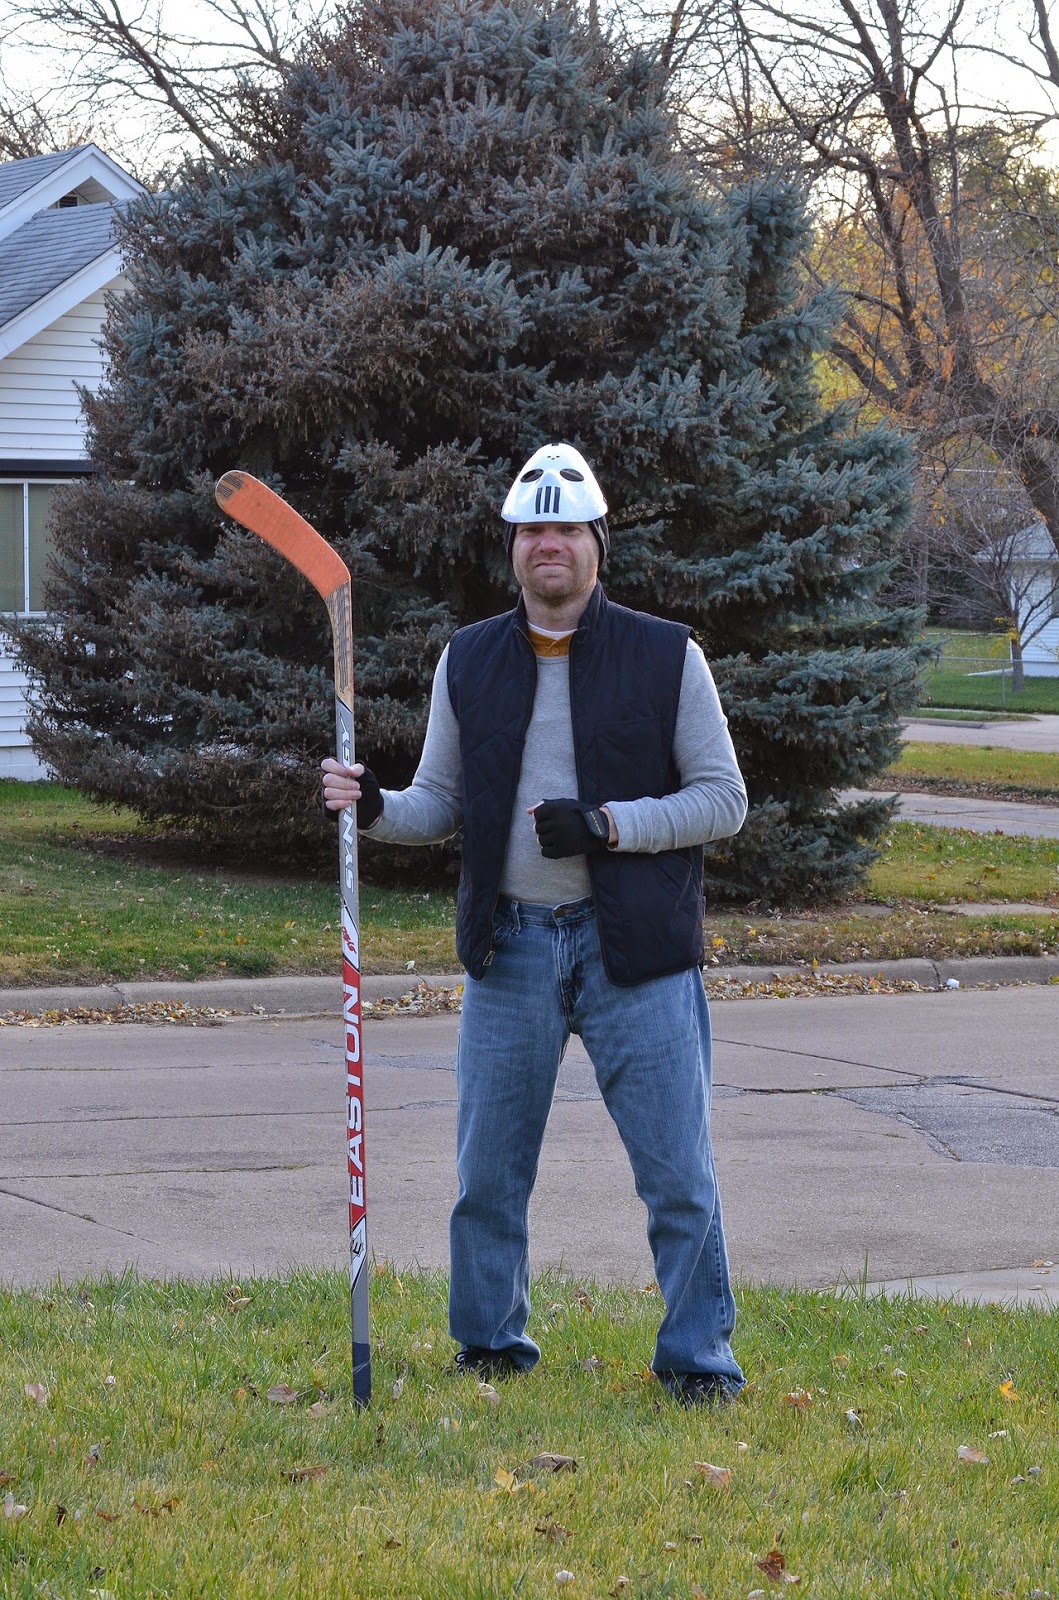
Bill as 'Casey Jones'


Bill got mistaken for Jason a lot but the true Ninja Turtle fans knew who he was. 

Friday, October 31, 2014

Photo Friday- It's Halloween!! (Part 1)

Happy Halloween everyone!  Are you ready to see all the little Elsa's, goblins, and ghosts tonight?  I know that we are ready here.  The candy is in the candy bowl, costumes are ready, and photos have been taken.  Yes, I made my boys get in their costumes last night so we could get some photos before we started trick-or-treating tonight.  One reason is that it is supposed to be a little chilly tonight and last night wasn't too bad.  Also, it seems like there is never enough time after to school to get costumes on, eat supper, and get going.  This year we did some fun photos the night before.  As you can see this is Part 1 of 2 for our Halloween memories so be sure to stop back later for more fun photos.  I know a lot of you have been excited to see what our theme is this year.  I did share this photo last night on Facebook just as a little teaser. 


I will reveal this year's theme at the end of this post, but first a little trip down memory lane going back to 2008 when we started doing our themed costumes. 

2008- Alvin and the Chipmunks
2009- The Three Little Pigs and the Big Bad Wolf

2010- Crayons

2011- Star Wars

2012- The Avengers

2013- Super Mario Bros.
2014- Teenage Mutant Ninja Turtles


Be sure to stop back tomorrow for more fun photos of the Ninja Turtles and a couple of surprise guests.  I hope you have a safe and happy Halloween.  Thanks for stopping!