Start with a strip of cardstock 12" x 1 1/4" and score every 1/4". A scoring board and bone folder work great for this. If you don't have a scoring board you can use your paper trimmer. Move the cutting blade to the opposite end and use a bone folder or embossing stylus in the cutting guide to score your paper.
I then added some ink to the edges of my paper for some added interest. You could also use a border punch to add a decorative edge to your rosette. I bet you could even tear the edges of the paper for a more rustic looking rosette (I might need to try that sometime).
After you've finished with the edges accordion fold your paper so it looks like this:
Once you have your paper folded you need to attach the edges together to form a ring. In the past I've used a stapler but this time I tried Glossy Accents. It worked great! You just have to hold the edges for a bit while it dries. You could also use your favorite dry adhesive but I really like the hold of the Glossy Accents.
Now comes the trickiest part. Using both hands, gather the paper in the middle and push down to form your rosette.

Once your rosette is formed it will need to be glued to something so that it doesn't pop back. I using Glossy Accents and a piece of thin chipboard punched with a circle punch. They work great for keeping the rosette together. Just apply Glossy Accents to the chipboard circle, place on the backside of the rosette, and let dry.
You will need to add a circle to the center of the front of the rosette as well. I used this piece of patterned paper from the paper kit I was using as inspiration for my centers. I cut out three different sized circles from cardstock, lightly sanded the edges, glued them together off center, and then glued them to the front of my rosette again using Glossy Accents. I just love how they turned out. Use your imagination here. You really can add anything to the centers of the rosettes depending on the look you want.

Here is my finished rosette:
I just love how it turned out! So fun! You could also use different widths of paper to make rosettes of different sizes. This rosette when finished is approximately 3 1/4" in diameter.
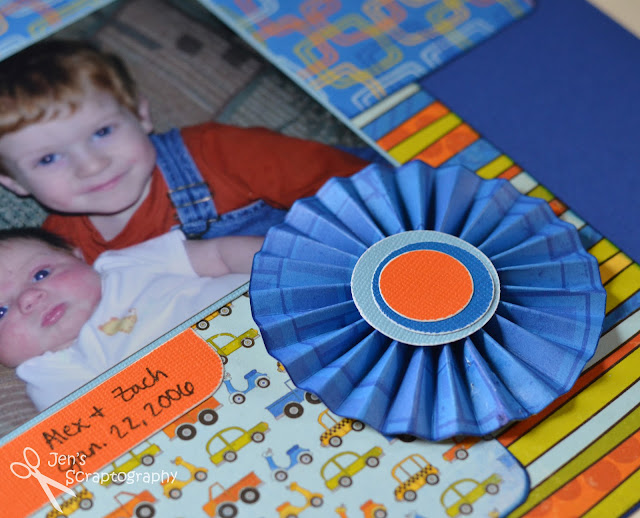
Here is one more closeup of the rosette on my scrapbook layout. Such a fun and cute way to add a little dimension and interest to your layout.
And a close up of one of the awesome titles from the Boys Will Be Boys cartridge. I just love the different layers this title has. I also love that I can customize my title to go with my layout. A perfect match every time!
Thanks for sticking with me on this lengthy post today. I hope you'll give making a paper rosette a try. Thanks for stopping!
Supplies:
- cardstock- The Paper Studio (Textured Cardstock Brights), misc
- patterned paper- BoBunny (On the Go Collection)
- Cricut cartridge- Boys Will Be Boys
- ink- Quick Quotes Powder Puff Chalking Ink (Blue Moon)
- adhesives- 3L (3D Foam Squares), Ranger (Glossy Accents)
- tools- Perfect Layers, sanding block, Creative Memories (circle cutter), Martha Stewart (score board), We R Memory Keepers (corner chomper 3/8"), bone folder
- pen- American Crafts Project Life Pens (black 08)


Very cool! Love the colors of this layout.
ReplyDelete