I'm finally getting a card up! My lack of posting cards and scrapbook layouts isn't because I haven't been doing anything, I've just been busy! I have a quite a few projects that are completed but need to be photographed. School will be starting before we know it and I'm sure then I'll be posting more frequently.
I few weeks ago one of my sons was invited to the movie theater for a birthday party to see Despicable Me 2. We don't see many movies in the theater (it's expensive with 4 boys) but this movie we all wanted to see. Since one was already going to be there we figured we'd go too. Of course I had to make a 'despicable' birthday card. We hadn't yet seen the movie but my boys knew that there were some color changing minions (thanks to their yogurt) and said that I should make a color changing minion card. Always up for a challenge here is what I came up with.
Let me share how I made this card and also show you the fun surprise on the inside!
When I first thought about a color change card I immediately thought of vellum and a secret panel. To make that secret panel I knew I would need to use my Gypsy. If you are not familiar with the Gypsy it is a tool to use with your Cricut. It allows you to weld shapes from different cartridges and makes planning your projects a ton easier. If you have a Cricut I would highly recommend getting a Gypsy. I used the George and Basic Shapes cartridge and my Gypsy to make some minion shapes and 'overalls'.
Once I had my shapes looking how I wanted them I placed my paper accordingly (yes, these are all scraps except for the card front). This is one of the main reasons I love my Gypsy. You never have to waste paper because you know exactly where to place it!
Once I had all of my pieces cut I could start assembling my card. Sorry I don't have a picture of all the pieces separate. I did part of the card late one evening and finished it the next morning. That is also why these aren't the best pictures. Some were taken on my iPhone and others with my Nikon. I was in a rush so they aren't stellar.
I first assembled the yellow minions and by using the holes in the front of the card as a guide, glued them inside the card. The bottom layer of the overalls is just a piece of the blue paper trimmed to match the shape of the minions. The top layer of the overalls is the piece I made on my Gypsy. I used some gromlets that came with my Crop A Dial Big Bite as the goggle frames. They were the perfect shape and size. I then found some google eyes that fit inside them.
My next step was to create the purple minions. To do this I just put a piece of purple vellum over the holes in the front of the card. I marked where the eyes were and used a circle punch to punch them out. This allowed the eyes to peek through the card. I then stuck the bottom layer of the overalls over the vellum lined up with the yellow minion overalls and did the same with the top overall layer. No need to cut the bottom off the overalls as it will be covered up with the secret panel.
Here is a view of the inside of the front cover of the card.
Next I worked on what I am calling the secret panel. It really isn't secret but it hides all of the mess from the previous step. It is also what gives this card the ability to 'change' color. This panel is slightly smaller than the front of the card so I inked the edges with some Distress Ink to add some dimension. I also stamped Happy Birthday in the top right corner using my Stamp-a-ma-jig so it would be placed exactly where I wanted it.
After the panel was completed I placed it on the front of the card and added some finishing touches. A stamped 'G' on the overalls and marker buttons completes their clothing. I free handed their arms and legs with markers. I am not an artist but the quirkiness really adds to the card. I added some marker hair (after seeing the movie I would have had purple wild hair). Oh well. The straps for their goggles are made with quilling paper. Some more Distress Ink around the edge of the card. And of course these purple minions needed frowns.

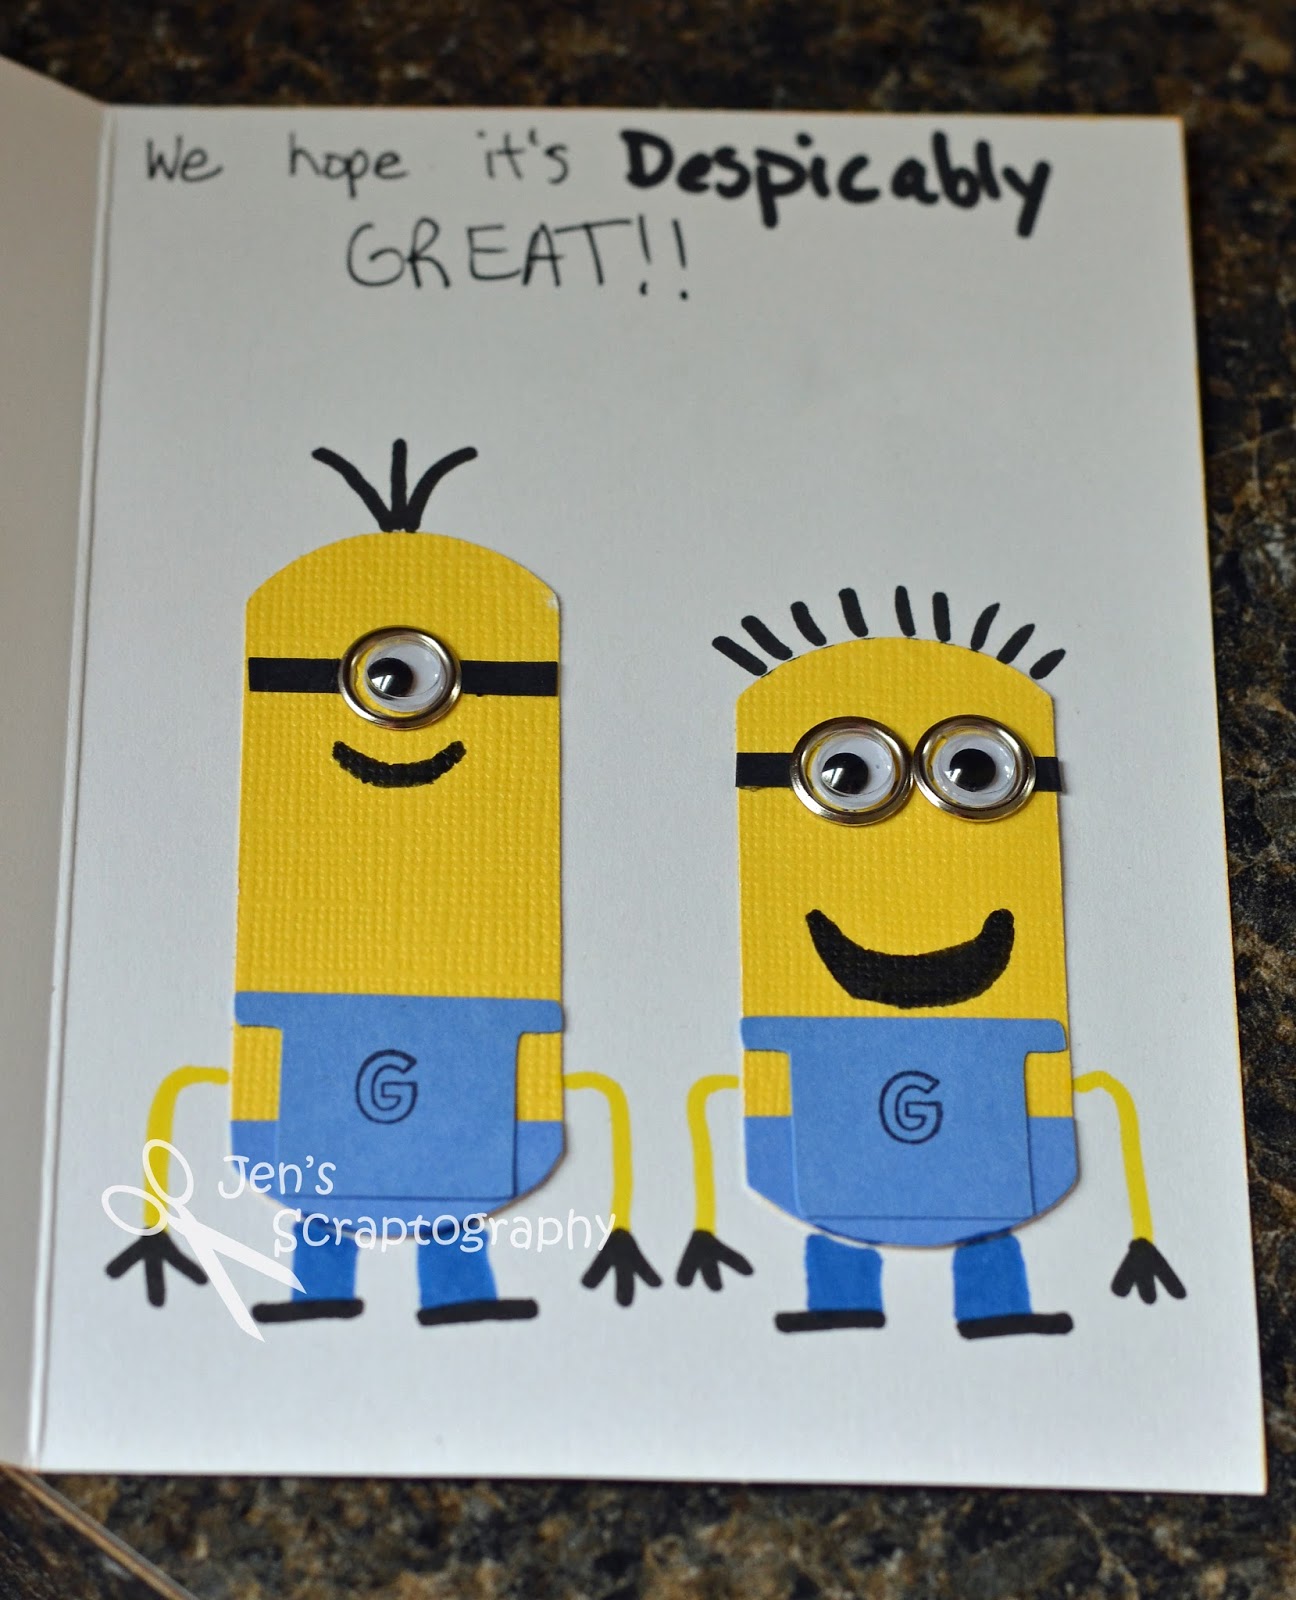
When you open the card the minions are now happy and yellow! I added the same details I did to the purple minions only this time they have smiles. Originally I had frowns on the yellow minions too because you could see through the vellum (another thing I will change if I make this card again). I used the negative pieces that were cut from the front of the card, cut holes out for the eyes, and stuck them under the purple vellum. This not only made the purple darker but allowed me to change those frowns into smiles.
Here's a close up of these adorable little minions. I just love them!
I hope you'll try making your own minion card. They are so fun and everyone loved it!! Thanks for stopping!!
Supplies:
- cardstock- misc scraps
- stamps- Stampin' Up!, Studio G
- ink- Tim Holtz Distress Ink (Spiced Marmalade), Memories Dye Ink (Black)
- Cricut cartridge- George and Basic Shapes
- tools- Stamp-a-ma-jig, EK Success (circle punch)
- embossing powder- Ranger (Superfine Clear)
- markers- Zig Writer (Pure Black, Pure Blue, Pure Yellow, Pure Violet)
- misc- vellum, quilling paper, google eyes, glue dots, gromlets (We R Memory Keepers)


No comments:
Post a Comment