Tuesday, February 18, 2014

Wine Birthday Card

Sorry I haven't posted in awhile.   I had my niece and nephew here all last week so needless to say with 6 kids in the house the blog got a little overlooked.  That also didn't leave me much time to create.  Luckily I have a card that I haven't yet shared and it fits with the Simon Says Stamp Wednesday Challenge Get Krafty.  Here's my card for today. 
I just love how this card turned out!  One of the fun things about it is that besides the water color paper I used for my image all of the other paper is kraft!!  I used a few techniques to change how the kraft paper looks so let me show you what I did.

I absolutely LOVE the Tim Holtz Bricked embossing folder.  Doesn't it work great with a wine themed card?!  After embossing the cardstock I used Fired Brick and Aged Mahogany Distress Inks to cover the raised areas.  While the ink was still wet I covered the whole piece with clear embossing powder.  This gives this border some awesome shine and texture.
To create the image for this card I first created some masks.  One for the wine glass and one for the bottle of wine.  I then stamped one wine glass and covered it with the mask.  Then I was able to stamp the other wine glass and the bottle of wine.  I then removed the mask and was left with this great clustered image!  I love the depth that using a mask gives.  So fun!  Using Distress Inks I smudged ink onto my stamp block and using a water brush I 'painted' my image.  I love coloring images this way.  I then stamped over the image with a texture stamp using Embossing Ink and covered the image with clear embossing powder.  This gives a little shine to parts of the image.  (Sorry you can't really see it in these photos.)  I then cut out the image with my scissors.  Not an easy task but well worth it.  After cutting out the image I used a marker to go over all the edges so no watercolor paper was showing.  This really finished off my image.  
This stamp set included some great phrases in addition to the wine glass and bottle.  I loved this sentiment and thought it was perfect for this birthday card. I stamped it using Distress Ink and then covered with clear embossing powder to get that shine.  Inking the edges with Vintage Photo and Walnut Stain add some great shading. 
I placed my stamped image on a circle of kraft cardstock and shaded it the same way I did the sentiment block.  I just love how different the kraft cardstock looks with a little bit of ink. 
Here you can see a little of that shine over my stamped image from the texture stamp. 
And one more photo of that great brick embossed border.  Embossing + Distress Ink + clear embossing powder = one of my favorite combinations! 
I hope you enjoyed this krafty card and it gets you thinking of using your kraft cardstock in new ways.  Thanks for stopping!

Supplies:
  • cardstock- kraft, watercolor paper
  • stamps- Fiskars (Aged to Perfection), Paper Inspirations (Ripple Stone Background)
  • ink- Tim Holtz Distress Ink (Fired Brick, Aged Mahogany, Crushed Olive, Forest Moss, Old Paper, Antique Linen, Brushed Corduroy, Vintage Photo, Walnut Stain, Pumice Stone, Embossing Ink), Close to My Heart (Cocoa), Tsukineko Momento (London Fog)
  • embossing folder- Tim Holtz Alterations (Bricked)
  • tools- Creative Memories (circle cutter), water brush, Fiskars (Stamp Press)
  • embossing powder- Ranger (Super Fine Clear)
  • adhesive- Scotch (Quick-Dry Adhesive), dimensional adhesive
  • pen- Zig Writer (Chocolate)
  • misc- masking paper


Saturday, February 8, 2014

Monster Valentine Card

I have another Valentine card to share with you today.  The challenges over at the Simon Says Stamp blog this week are Love Notes and Have a Heart.  Since these two themes work well together I decided to enter both with one card.  I wanted to create something fun, different, and not your typical Valentine's day card.  Here is what I came up with. 
Isn't this just fun?!  I went with typical Valentine's colors and of course hearts but the monster is definitely not something you would think of on Valentine's Day.  This sentiment works perfectly though with this monster and helps to tie this Valentine card right up.  I put some glitter on the ovals of the monster and covered the whole thing with Glossy Accents.  This make him look a little slimy which I think is perfect!  Google eyes really finish him off.  I placed him some patterned paper with inked edges on a Polaroid type frame.  These frames are showing up every where and it really worked with my card.  So fun! 
I wanted to add some embellishments to the frame but didn't have any in my stash that would work so I made my own!  I started with this sheet of paper and punched out some hearts using my circle punch.  I inked the edges of the circles with Black Soot ink.  I then put a layer of Glossy Accents on and sprinkled a little glitter over it.  Once that was dry I added a lot of Glossy Accents over the entire circle.  When it dried I had a custom embellishment that matched my card perfectly! 
I think they look great all lined up in a row and also add a little dimension.  I love that they were super easy to make and used supplies I had on hand.
 I just love that dimension!!
I hope you enjoyed this fun card.  I know my husband will when I give it to him.  I hope this card inspires you to think outside the box this Valentine's Day and create a fun card using supplies you have on hand.  Thanks for stopping!

Supplies:
  • cardstock- misc scraps
  • patterned paper- Die Cuts With a View (Everyday Stack)
  • Cricut cartridge- Mini Monsters, Create A Critter
  • ink- Tim Holtz Distress Ink (Black Soot)
  • glitter- Recollections (Garnet), Doodlebug Designs, Inc
  • tools- Perfect Layers, EK Success (circle punch)
  • adhesives- Xyron, Ranger (Glossy Accents), Scotch ATG
  • misc- google eyes, American Crafts (Project Life pen 03 black)


Wednesday, February 5, 2014

Winter Wonderland

I'm Playing in Paradise today with their Frosty challenge.  I knew that I had some wonderful frosty pictures from Thanksgiving so I pulled those out.  Here is what I came up with. 
I really wanted the photos to take center stage with this layout so I kept all of the other elements on the page white.  I love how it turned out!  I cut the 'winter' part of the title with the Opposites Attract Cricut cartridge, applied glitter on it, and layered it on the cut shadow.  I also put this on pop dots for some dimension.  For the 'wonderland' part of the title I used some glitter Thickers.  I replaced the 'o' with a snowflake to add to the theme of the page.  A gem in the middle of the snowflake adds just a little sparkle.         
You really can't see it well in the above photo but I stamped snowflakes in the upper left and bottom right corners and covered them with Ranger Holographic embossing powder.  This adds just a little interest to this white page and helps your eye move across the page. 

A few Glitter Domes and some journaling and this page is complete.  Thanks for stopping!

Supplies:
  • cardstock- Bazzill (Diamond), misc
  • stamp- Inkadinkado (Snowflakes)
  • ink- Versamark (Watermark)
  • embossing powder- Ranger (Holographic)
  • alpha stickers- American Crafts (Thickers- Delight)
  • Cricut cartridge- Opposites Attract
  • tools- Perfect Layers, Recollections (5/8" snowflake punch), Imaginisce (I-Rock)
  • misc- Doodlebug Designs Inc. (glitter), Imaginisce (gems), Mark Richards (Glitter Dome stickers), pop dots, American Crafts (Project Life Pen- 03 black)

Tuesday, February 4, 2014

Lucky Stars Card

I'm participating in another Simon Says Stamp challenge.  This time the theme is Anything Goes with Twine or String.  I knew that I wanted to use some of my Doodle Twine but wanted to use it in a different way than I normally would.  Here is what I came up with. 
 
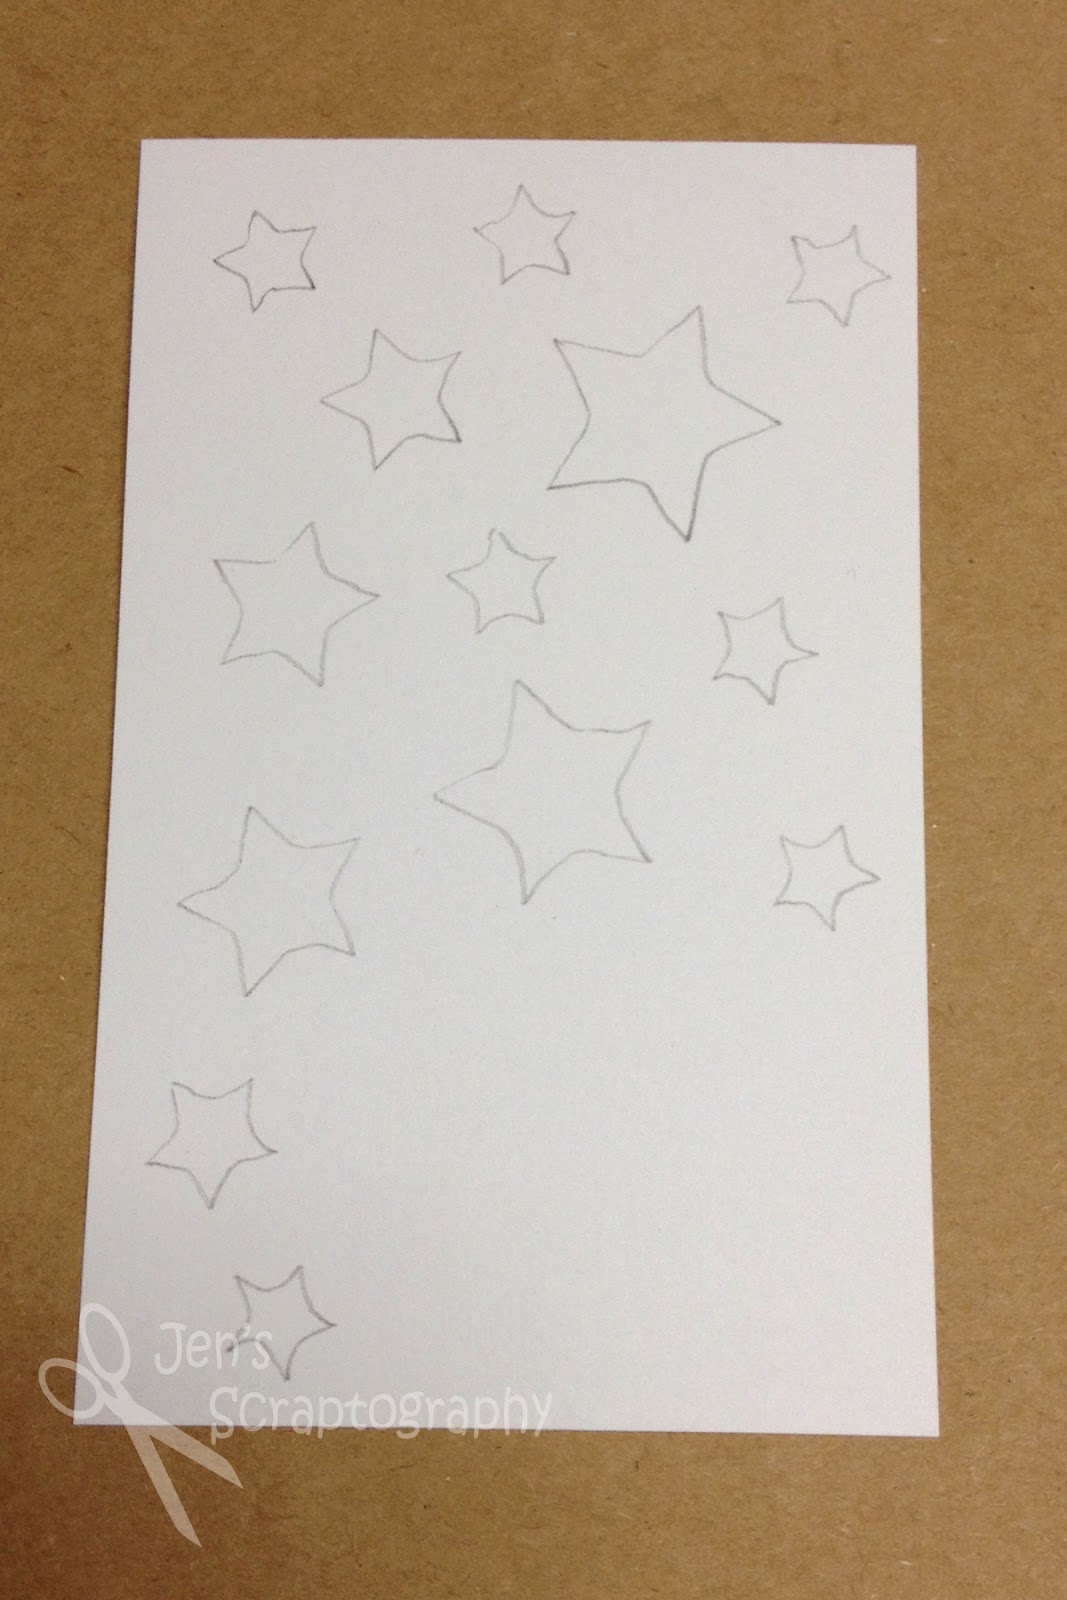
Isn't this card fun?!  Let me show you how I made it.  I started by creating a file on my Gypsy  that was a rectangle filled with different sized stars.  If you don't have a Gypsy you could use any dies or punches to create a panel with different sized shapes all over it.  I left the bottom right corner blank for my sentiment. 
I then cut another piece of white cardstock the same size and layered the two pieces together and traced the stars.  You will need to know where the stars are for the next and most important step.
I ran the cardstock with the traced stars through my Xyron machine printed side down so the traced stars would all be covered with adhesive.  Then I covered each star with pieces of Doodle Twine until all of the stars were covered. I tried to alternate the way I covered the stars to add some interest.  (When I do this technique again I will only peel back the sticker paper as I get to the star I want to cover.  I made the mistake of uncovering the whole thing which made it a little hard at times because my hand kept getting stuck on the paper.)  
Once the entire page was covered I used some dimensional adhesive and put the cut out piece over the top.  I now have some awesome rainbow colored stars!
 Here are a couple more views of these stars.  I just love how they turned out! 

I forgot to mention that before I added the dimensional adhesive I stamped and embossed my sentiment.  It works perfectly for this card. 
I little black cardstock mat with a scalloped edge and this card is complete.  I hope this will inspire you to use your twine in new ways.  I know I'll be doing this technique again.  It was super easy and the result is awesome!  Thanks for stopping!

Supplies:
  • cardstock- misc
  • Cricut cartridge- George and Basic Shapes
  • stamp- Hero Arts (Operation Write Home CL582)
  • ink- Tim Holtz Distress Ink (Black Soot)
  • embossing powder- Ranger (Super Fine Clear)
  • twine- Doodlebug Designs Inc. (Doodle Twine-Bright Assortment, Primary Assortment)
  • tools- Perfect Layers, American Crafts (Knockouts Border Punch)
  • misc- dimensional adhesive, Xyron

Saturday, February 1, 2014

Cowboy Up! Layout

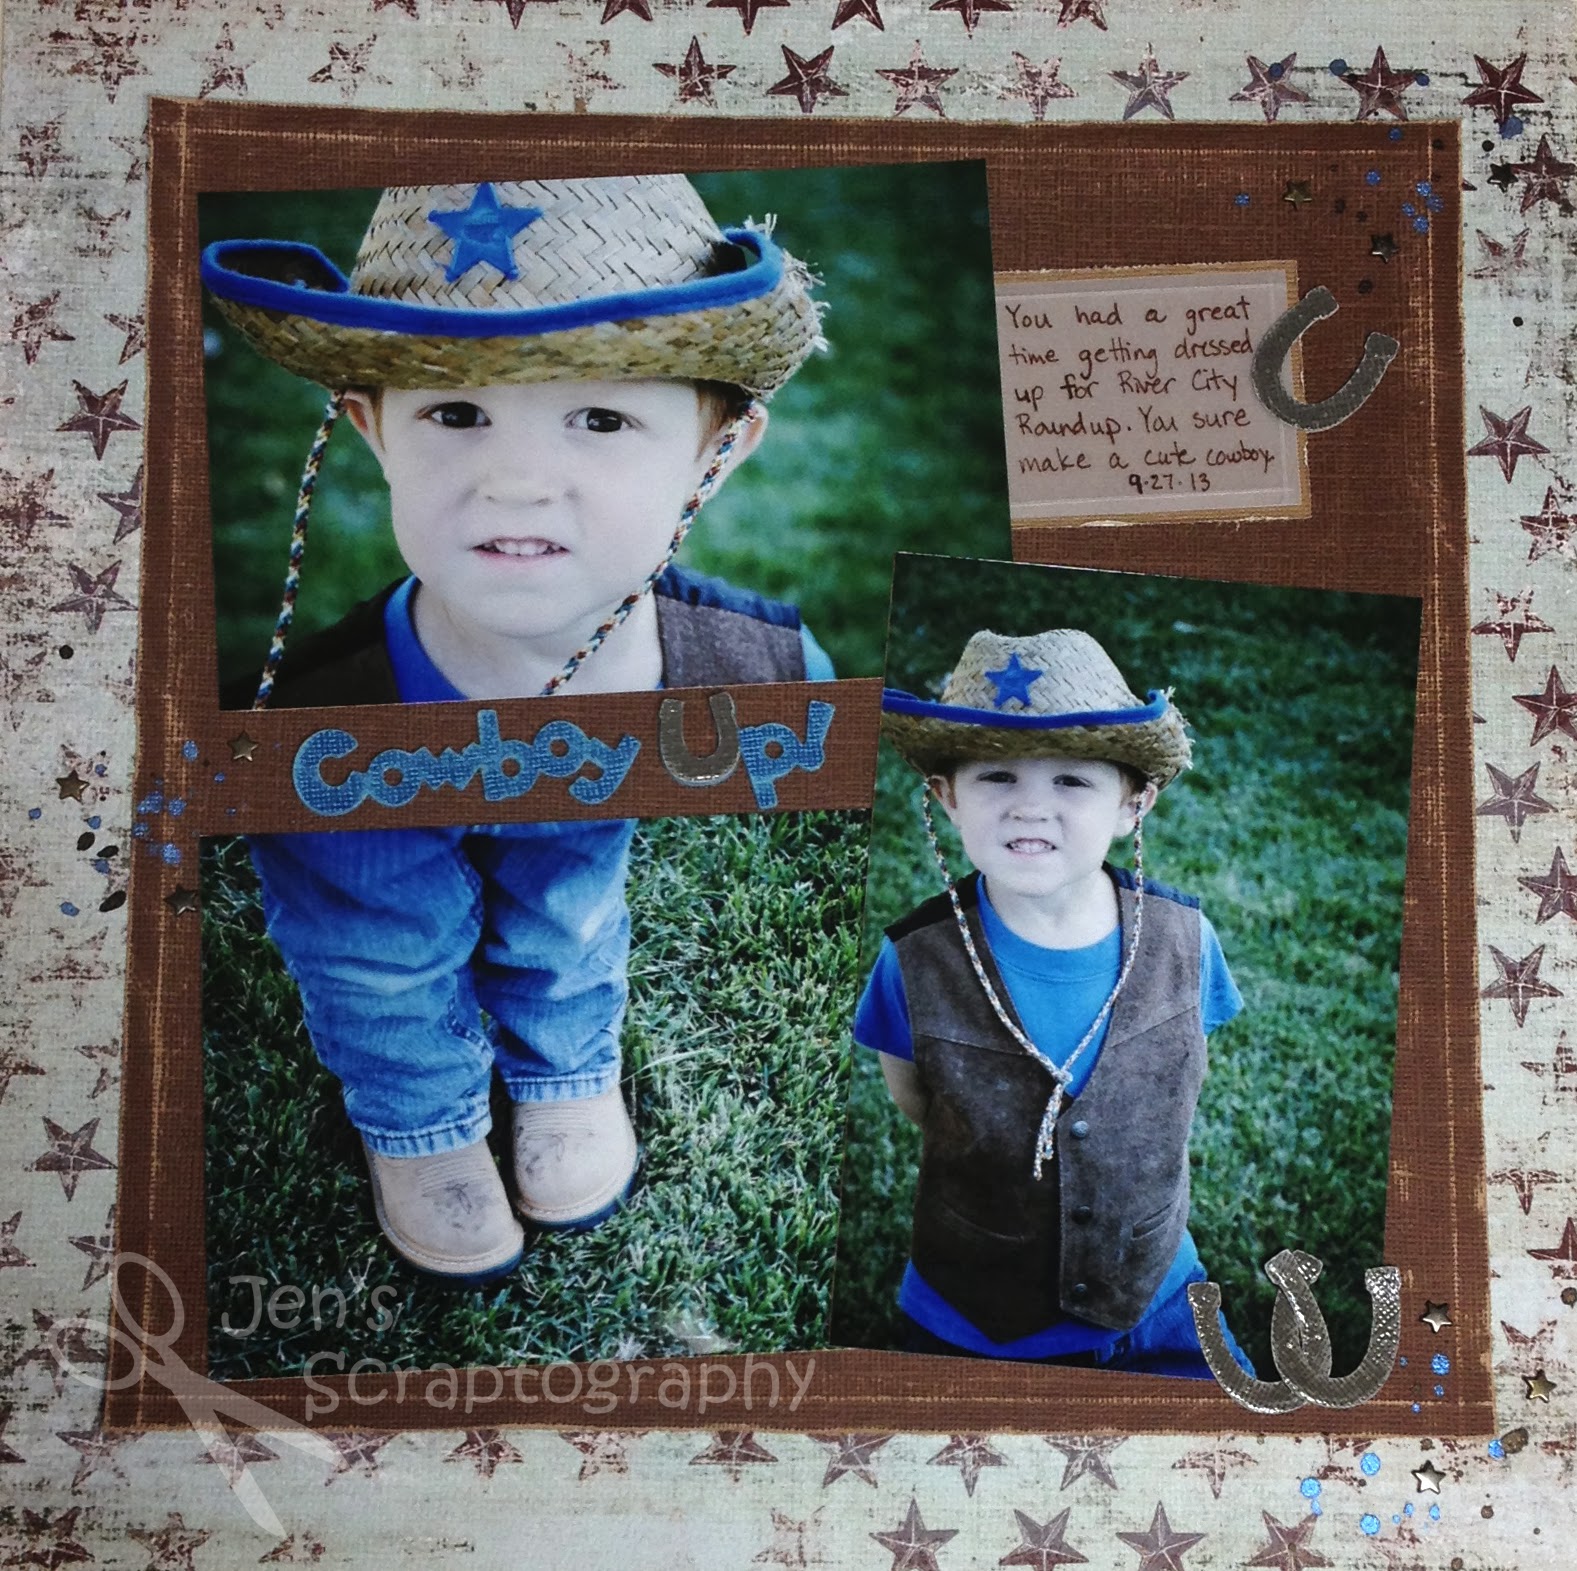
I happened to stumble upon the Simon Says Stamp Blog- Monday Challenge this week while online.  This weeks theme is 'this is where the cowboy rides away'.  I love a challenge so I decided to play along.  I knew I had some super cute photos of my youngest from River City Roundup day at school this year so I decided to use those for my layout.  Here is what I came up with.
I am so happy with how this page turned out!  After choosing my papers I worked on my photo placement.  This took me a long time!  I originally wanted them in a closer cluster but the photo of his boots just didn't look right below either of the other photos.  I finally decided to put a little space between them to add my title.  That did the trick.  I placed them all on a large square that I embossed using my score board.  I then distressed and sanded the edges to give a rustic feel to the layout.  I cut the title from the Old West Cricut cartridge five times.  I then layered and glued all five images together to get a chipboard like title.  I just love the dimension.  
I also sanded the top layer and covered the 'u' with Glossy Accents.  I love how this paper looks almost like denim.  Perfect for this layout.  A fun title for a fun page.  
To add some interest and a visual triangle on my page I got out my Glimmer Mists.  I hardly ever use them but wanted to try them on this page.  I have both a blue and brown one so they matched perfectly.  Instead of spraying them on my page I sprinkled them next to my title, journaling, and horseshoe accents.  I love the sparkle and interest they give to the page.  I will definitely be using these more on my pages.  I also added some mini star brads in these same areas.  I love how this ties the whole page together.   
I did my journaling on a piece of vellum and embossed the edges to match the embossed edges of my photo mat.   Another horseshoe covered in Glossy Accents brings attention to the journaling and ties it in with the rest of the page. 
I hope you enjoyed this layout.  I'm glad to get another page done especially since it's for my little guy.  His book isn't very full yet.  Thanks for stopping!

Supplies:
  • cardstock- Core'dinations
  • patterned paper- My Mind's Eye (29th Street Market)
  • Cricut cartridge- Old West
  • tools- Close to My Heart (Edge Distresser), sanding block, Martha Stewart (Scoring Board)
  • misc- Ranger (Glossy Accents), vellum, Tattered Angels Glimmer Mist (Denim Blue, Tattered Leather), The Paper Studio (Mini Star Brads), Zig Writer (Chocolate)