Today I'm sharing a couple of small Project Life pages for you. I still haven't completely 'made the switch' but I'm loving this style of scrapbooking more and more. I even recently signed up for the
Studio Calico Project Life monthly kit. I know I'm technically breaking that promise of not spending money on scrapbooking supplies unless I actually 'need' it, but I really love the idea of some new and trendy things arriving right at my front door every month! Plus, the only way my husband would let me sign up for it was if I promised to work out 4 days a week! That was on my list too and I must admit I've been failing at it. This is just the motivation I need. I'll let you know what I think of it when my first kit arrives next week (and how my workouts are going)!
Here are today's pages. I used the Design H Project Life plastic for these layouts. I love that you can use these in so many different ways! I would usually think of this as an additional page in the middle of a large spread with many photos but it also works great as a small page in the middle of an album. Since these pages are in one protector I was able to stretch my supplies. I matted all the photos with only two pieces of paper (one photo on the front side and one on the back from each layout). I also only used two Project Life cards! I love when I can use both sides of a card on different layouts.
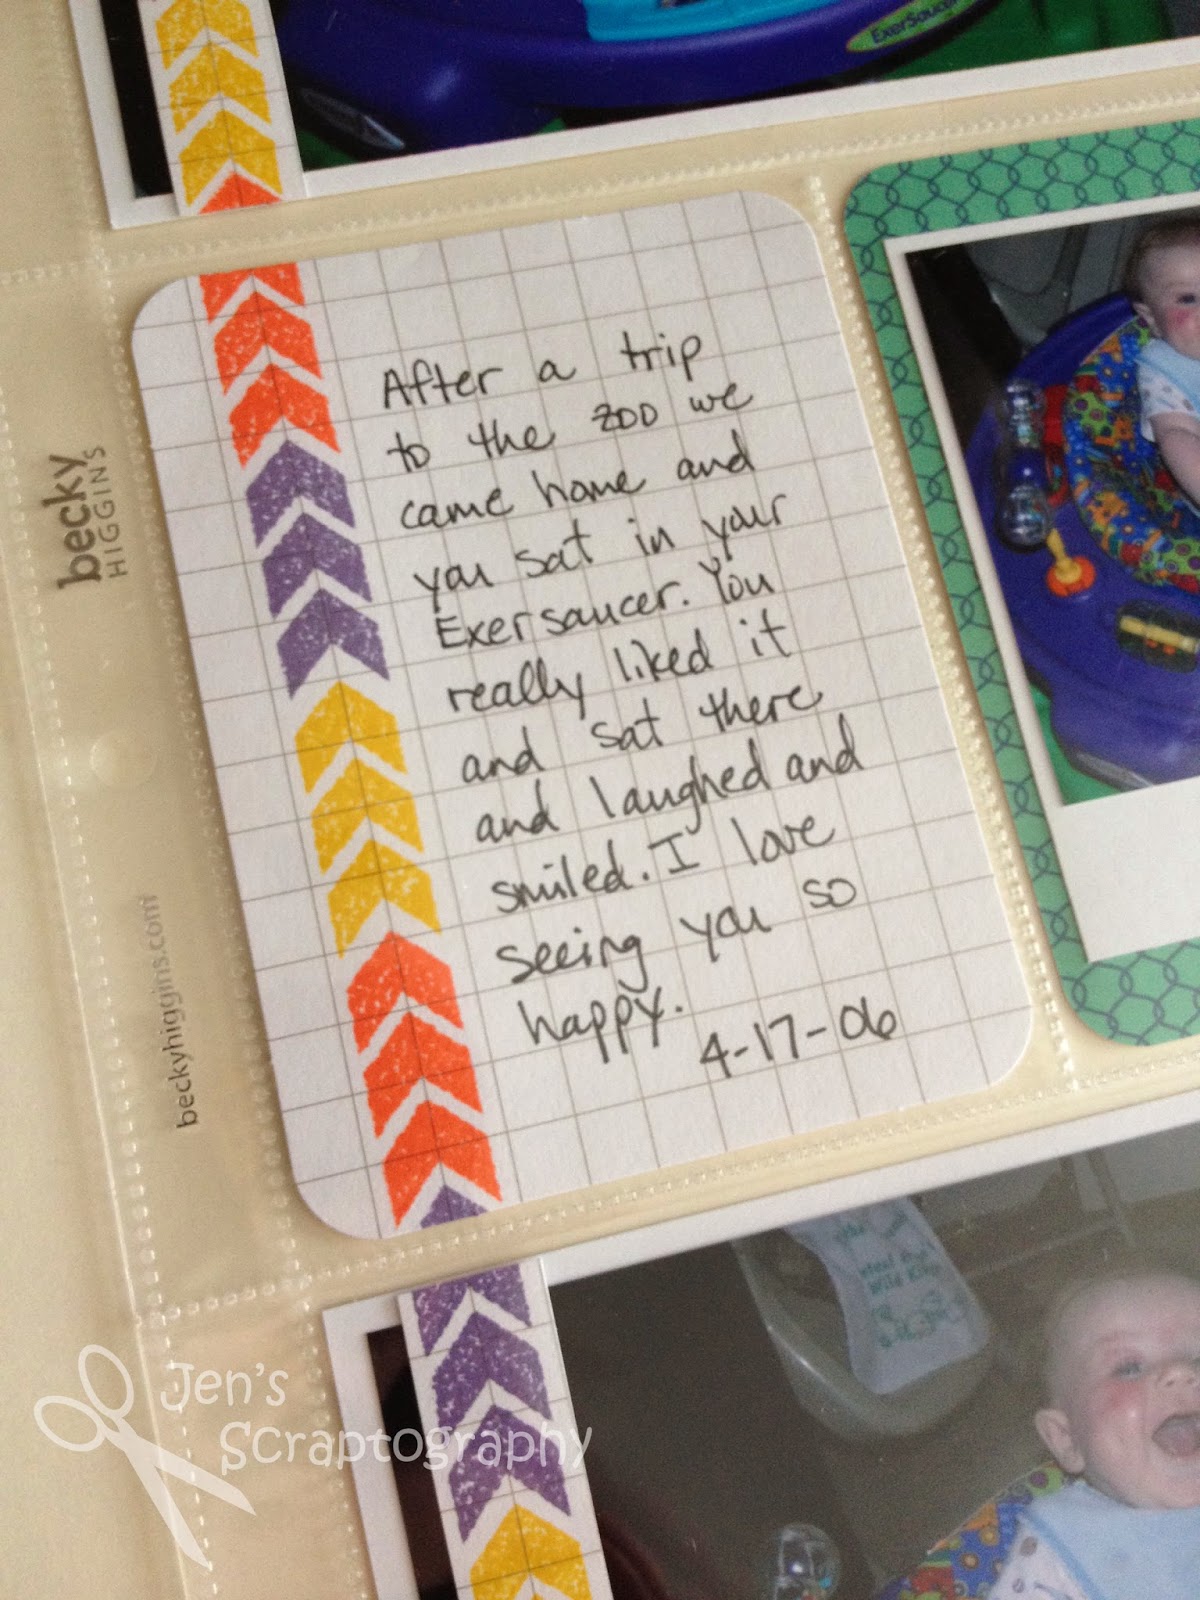
To add some interest to the left page I made a border with Distress Inks that matched my photos. I just stamped the three arrows over and over in the different colors. I love the fun addition this makes to the page.
I recently picked up a roller stamp at Target for $1.50! I love that they carry seasonal items in their scrapbooking department. When the season is over you can snag some great deals! Valentine's is not my favorite holiday but I'm a sucker for an inexpensive stamp. This one had this great LOVE with the hearts on either side (among other designs). I love the simplicity of this stamp and you could easily cover the hearts with brads, flowers, or anything. I used some Diamond Stickles to add some sparkle. Also, this Project Life card was the perfect background for this 'Polaroid' photo. The other side is a journaling card which you'll see in just a bit.
My photos had some open space so I pulled out some rubons that I really need to use up. I added a phrase to each photo. I just love using up supplies!
Here's a closer look at my journaling. (Yes, I really am still scrapbooking 2006. I'm really hoping to get started on some current layouts with my new monthly Studio Calico kits. Keep your fingers crossed). I just love these grid cards. I think you'll love how I used the back side of this card on the other layout.
Now onto the backside of this layout. I already mentioned that I matted the photos with the same paper. This side was even easier than the other side because I only had the journaling and a filler card. Here is the backside of the 'Polaroid' card. It was the perfect place to tell my story. I just added some small alpha stickers and that's it.

I had a little fun with the back of the grid card. I knew that I just wanted a filler type card here so I used a stamp set that I've had for a long time and made my own filler card! I stamped the train in red ink, covered it with some masking paper, then I stamped the track. I also stamped the train on a scrap of white paper with black ink and cut out the top of the train and the tires to add some interest to my train. I used some more masking paper before adding the crossing sign. I just love how this card turned out!! Had I been thinking I would have reversed the order of the cards so the train was moving 'into' my layout instead of 'away' from it. The reason I couldn't do this was because I was using the backs of the other cards and I didn't want to move my borders. Next time I'll plan ahead a little better.
Here is a close up of my cute little train. You could also use stickers or patterned paper to create a filler card that matches your layout. Have fun with it.
Two more pages done in the book! I hope you enjoyed these quick Project Life pages. Hopefully you'll be seeing more of these types of layouts once my kit arrives. If you follow me on Facebook I'm sure I'll post about it on there. Have a great day and thanks for stopping!
Supplies:
- cardstock- The Paper Studio
- ink- Tim Holtz Distress (Mustard Seed, Ripe Persimmon, Dusty Concord), Momento (Tuxedo Black, London Fog), Close to My Heart (Holiday Red, Sunny Yellow, Cocoa)
- stamps- My Mind's Eye (Boy Crazy), American Crafts (Valentine Roller Stamp), Close to My Heart (Choo Choo Train C1221)
- pen- American Crafts (Project Life pen 03 Black, 05 Black)
- alpha stickers- BoBunny (Letterific)
- Project Life- Jade Core Kit, grid cards, Design H plastic
- misc- rubons, Ranger (Diamond Stickles), masking paper


No comments:
Post a Comment