Wednesday, February 13, 2013

Color, Contrast, and a Lot of Circles

I've got another super simple layout to share with you today.  Just because it's super simple doesn't mean that it has to be boring.  Sometimes all you need are some bright colors, some contrast, and a recurring shape to really make a layout fun. 

I love how the black and white really contrast with the bright blue and green papers I used.  The black photo mats really let the photos stand out.  Only using one patterned paper keeps things very simple but gives the page just enough interest.  This patterned paper also contrasts with all of the circles nicely which also gives a little interest to the page.    
It's no secret that I love using circles.  On this page they are everywhere!  These letter stickers came in a collection pack (along with the patterned paper) but were a little too small for what I had in mind.  Matting them on a black circle helped size wise but they were still lacking a little something.  That's when I got out my white gel pen and added some dots around the edge!  It was exactly what my title needed to give it a little something extra.     
The white dots also made an appearance on the opposite side of the page to give just a little detail to the bright blue cardstock and tie the page together.  The black scalloped border was done with a circle punch!  If you missed my post about how to create that you can find it here.  I love how fun and easy it is to create this border!

There you have it!  I hope I've inspired you to make a simple page with some bright colors, some contrast, and a recurring shape.  And if your page is missing a little something get out that white gel pen!  It can do wonders.  Thanks for stopping!  

Supplies:
  • cardstock: The Paper Studio (Textured Cardstock Brights), misc
  • patterned paper: Colorbök (Planes & Trains Deluxe Page Kit)
  • alpha stickers : Colorbök (Planes & Trains Deluxe Page Kit)
  • tools: Perfect Layers, EK Success (circle punches-1 1/4" and 1/2")
  • pens: Creative Memories (fine tip black), Uniball (Signo Broad white)

Monday, February 11, 2013

Valentine's Day Card


Some of you may remember that I created this card for my grandmother a week and a half ago.  Unfortunately, she was never able to enjoy it before she passed away.  Today as I was browsing my favorite blogs I noticed the challenge this week over at Playing in Paradise #103 is A Loved One.  I thought this card was a perfect fit since it was made for a loved one.

This card is very simple to recreate.  Just stamp one image four times with Versamark ink.  Heat emboss one with white embossing powder and the others with clear embossing powder.  Cut out your images and then mat on a coordinating cardstock.  I added a panel of textured cardstock at the bottom to be a background for my ribbon.  White gel pen dots really finish off the card.  Super simple yet super fun.  I hope this inspires you to create a card for your loved one.  Thanks for stopping.

Supplies:

  • cardstock: Wausau Paper (Crinkles Cotton), Paper Reflections (Burgundy Greeting Card), white scrap
  • stamp: Stampin' Up (Mon Ami)
  • ink: Versamark (Watermark Ink)
  • embossing powder: Ranger (Superfine Clear), American Crafts (Zing White)
  • pen: Uniball (Signo Broad)
  • ribbon: American Crafts

Bubbles


I'm back.  It was so wonderful to be able to spend almost a week honoring the life of my grandmother with family and friends.  She will be missed but we are happy to know that she is in a much better place.  Thanks to all of you who wished our family well and prayed for us.  We appreciated it.

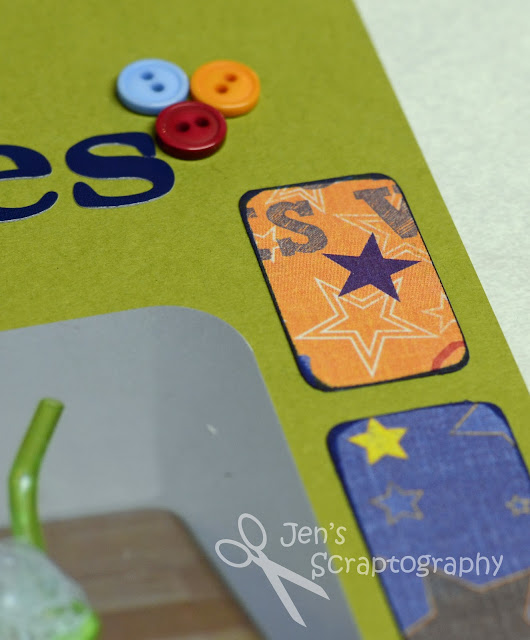
I have a fun but simple page for you today.  I was inspired by this layout when I created my page.  I really liked the rounded corners and lots of different patterned papers.  I made my band of papers run horizontally instead of vertically to change the layout just a bit.


I used a page kit to make putting this layout together very quick.  I love being able to grab a collection of paper and know that it will all work together!  In fact the only items not included in the kit are the buttons and cardstock!  


Using letter stickers from the kit made making my title a breeze.  Adding a trio of buttons helps tie it to the rest of the page and also helps form a point of a visual triangle to lead viewers around the page.  Buttons are a great and inexpensive element to add some interest to your pages!   


 In addition to rounding the corners I also inked the edges with some Blue Moon ink from Quick Quotes.  This helps tie all of the paper together even more.  This is another of my favorite things to do and really makes the page look finished. 


I hope you enjoyed this simple and easy to recreate layout.  This layout is great for using scraps of paper from your favorite collections.  So pull out your corner rounder, ink, and buttons and get a page done today!  Thanks for stopping.

Supplies:
  • cardstock: Bazzill Basics Paper
  • patterned paper: Fancy Pants Design (To the Moon)
  • alphabet stickers: Fancy Pants Design (To the Moon)
  • ink: Quick Quotes Powder Puff chalking ink (Blue Moon)
  • pen: Zig writer (Chocolate)
  • tools: Creative Memories (corner rounder), We R Memory Keepers (Corner Chomper)
  • misc: buttons, glue dots

Friday, February 1, 2013

Photo Friday- Everyday Life

Lately, I've been seeing a lot about everyday life photos.  Becky Higgins is looking for your everyday pictures here and photographers are even offering sessions in your home to catch these everyday moments.  I like to think that I do a pretty good job capturing those moments, but a lot of the time they are only on my phone.  It's always there and ready to catch a quick shot.  The past few weeks though, I've really been trying to make sure that I'm capturing these moments not only on my phone, but also with my DSLR.  That's why I have it so why not put it to use.  These everyday moments need to get documented just as much, if not more, than those special occasions.  After all, these moments are what life is all about!  So here is a glimpse into our everyday life from the past few weeks.   

Zach making french toast.
He was very careful to make sure it wasn't burning.  It tasted GREAT!
My three boys with their three PAW awards all on the same day.
Time for Chutes and Ladders (with Candy Land men because we don't have enough boy characters in Chutes and Ladders and no one wants to be a girl).  
Lego podiums to show the outcome of the game.
A rousing game of Johnny Tractor's Golden Apple Harvest.
I love the tractor pieces in this game.
Alex patiently waiting his turn.
Geoff actually fell asleep this way.  No Photoshop needed. 
These photos are nothing fancy.  They are not edited because neither is life.  They show a side of my boys that I love.  But most importantly they show moments I want to remember forever.  I hope you enjoyed this little glimpse into our life.  Don't forget to record your own everyday moments.  Someday you will be glad you did.  Thanks for stopping!

Wednesday, January 30, 2013

A Brothers Love

I'm back with another page for you.  With the snow day we had today I was able to get caught up on photographing pages for the blog so hopefully I'll be sharing lots of great ideas with you.  Today I not only have a page to share, but I also have a fun idea for using your leftover supplies!

The page above is a page for our family album.  I got my inspiration from a sketch I found on Pinterest.  I love starting with a sketch and going from there!  This sketch I actually turned sideways.  Don't forget that you can always flip a sketch around to fit your photos.  I love having a collection of sketches on Pinterest.  There are so many great ideas on there! 


I used a border punch and a circle punch to add a little extra to this layout.  I love to punch small circles out of a coordinating paper and put them on pop dots.  It adds just a little bit of dimension and it's an inexpensive way to add a little something to your pages.  And see that cute little index card?  I found these super small ones at back to school time.  They are a great size for adding journaling to any layout!   


My title was of course cut using my Cricut.  I used the Opposites Attract cartridge.  It's great for a title when you have two words that you want to emphasize.  The block and script letters look great together.  I cut the 'a' out of kraft cardstock and then inked it to give it a subtle color change.  This is also a great way to use up those scraps.  
 

Here's another view of my title.  I love how the script word connects with both the block letters and my photo.   


Remember that photo sleeve I used on the Special Delivery page?  Here is the back of that page.  I tried to keep my layout as close to the layout above as much as I could.  I only had to use scraps of the patterned paper and cardstock to fill the 4x6 openings.  I also didn't crop and mat these photos which was a time saver.  To save even more paper I adhered the photo and title to the back of the Special Delivery title!  Your possibilities really are endless with these photo sleeves.

And what about that fun tip for using your leftover supplies?  I read this in a magazine a while back.  Use what you have leftover and the tools you have left out to make a card!  We all need cards and if you already have supplies out that match why not put them to good use.   


For this card I used leftover cardstock to make the base of the card.  I then cut the train out of a piece of leftover cardstock that would have otherwise went in the recycling bin.  The little stars were also cut out of that paper.  The Doodle Twine was from a bin I leave on my desk to to save small scraps.  It happened to fit perfectly.  I left this card blank on purpose so that it could either be a baby or birthday card.  So the next time you finish a page use your leftover supplies to make a card or two!  I'm going to try to do this more in the future and of course will be sharing.

I hope you enjoyed these ideas I had for you today.  Be sure to stop back for Photo Friday.  I have some everyday moments to share that I think you'll like.  Thanks for stopping!

Supplies:

  • cardstock: kraft and misc. scraps
  • patterned paper: Autumn Leaves (Choo Choo, Clever)
  • Cricut cartridge: Opposites Attract
  • ink: Tim Holtz Distress Ink (Walnut Stain, Faded Jeans) 
  • tools: American Crafts (Knockout Border Punch), EK Success (circle punch), Perfect Layers
  • pen: Zig Writer (Chocolate)
  • adhesive: Xyron
  • misc: pop dots, Oxford 3x2.5" index cards
  • additional supplies used for card: Sakura (Jelly Roll pen-Stardust), We R Memory Keepers (Corner Chomper 1/8"), Doodlebug Designs (Doodle Twine), Scotch (Quick Dry Adhesive)


Tuesday, January 29, 2013

Special Delivery


Remember that cute little seven year old from Photo Friday?  Well, in 'scrapbook land' that little boy was just born!  Yes, I'm seven years behind in my scrapbooks.  Am I OK with it?  Absolutely!  I had an aha moment about this last week and posted it on the new Jen's Scraptography Facebook page!  Stop by there to see what that aha moment was.   

One of the reasons I'm so far behind is that I keep an album for each of my four boys and one for our family.  I know crazy, right!?  But I want them to be able to take their own albums someday to share with their own families.  Now, that doesn't mean that I make 5 copies of every layout and put them in every book.  That would be crazy!  Sometimes though special layouts make it into two or more of the albums.  This page about Alex's delivery went in our family book and his book.  Sometimes the layouts will be the exact same when going into more than one album and sometimes I'll tweak it a bit to conserve supplies or because I didn't like the way something turned out.  For this page I wanted a very simple layout to let the story and photos really take the lead.   


The title I made using my Cricut and Gypsy.  I love the way it turned out!  So fun!  And the best part is that Alex helped me!  I originally titled it Special Delivery and he said, "Mom, shouldn't that be Special Delivery from God?"  Of course I had to change it.  Love that kid!  Some twine from Doodlebug Designs and an embossing folder from Cuttlebug really make this title look like I spent some money on it.  I love knowing that it was all made from scraps!!   


In order to conserve paper (and time) I put this same layout in a We R Memory Keepers Ring Albums Made Easy Photo Sleeve for Alex's book.  What a time saver!  Just put in your photos, use a large scrap of paper for the title and journaling spot, and you are done.  No stress and they look almost the same!  If you are new to scrapbooking these photo sleeves are a great way to get your feet a little wet without using a lot of supplies.  To make it even easier purchase a title at your favorite scrapbooking store and then you would only need to journal!  These photo sleeves come in many different configurations too (this one has 4-4x6 pockets and 1-8x6 pocket).  Keep an eye out for them here as I'm sure I'll be using more of them.   


I hope you enjoyed this simple and easy page.  I'm excited to finally get some more pages done in Alex's book so there will be more pages making their way to the blog soon.  Come back later this week for how I used the back of this photo sleeve.  Thanks for stopping!


Supplies:
  • cardstock: kraft, misc scraps
  • stamp: My Sentiments Exactly (Baby Sentiments)
  • twine: Doodlebug Design Inc. (Doodle Twine Baby Boy Asst.)
  • ink: VersaMark (watermark stamp pad)
  • embossing powder: American Crafts (Zing! White)
  • embossing folder: Cuttlebug (Polka Dots)
  • adhesives: Scotch (Quick-Dry Adhesive), pop dots
  • Cricut cartridges: Create a Critter
  • gel pen: Uniball (Signo Broad)
  • photo sleeve: We R Memory Keepers (Item #50038-4)

Friday, January 25, 2013

Photo Friday- Alex is 7!

It's Friday and I'm going to share some pictures I took last weekend of my son, Alex.  I always try to get pictures of the boys close to their birthdays but because of illness and travels Alex's had to wait.  I can't believe that he is seven already!!  Where has the time gone.  I'm still scrapbooking his baby pictures (look for some layouts up on the blog this week).  This kid is so happy and full of life.  He's also feisty and very independent.  He's smart, funny, and loves his brothers.  I love that toothless grin and the sparkle in his eyes.  These pictures say it all.  I hope you enjoy these as much as I do.  Thanks for stopping!